
When developing a XAF application, Security System splits users into groups according to roles. XAF concept provides that the Application Model can be configured for all users (Model.xafml file) in whole or individually for each user (Model.User.xafml file). For these tasks, a special tool is provided - Model Editor.
When automating a number of business processes an additional requirement is present. It is very useful to be able to configure the Application Model to a user group, i.e. create and configure Work Place. Moreover, users of this Work Place may be included in various roles and have different sets of permissions.
Xafari Workplace Module adds an extra layer in the Application Model, which allows you to configure user Work Place. Each user can have access to many Work Places. In turn, the user model differences are stored individually for each user and for a particular Work Place.
In this post, we will examine Xafari Work Place functionality.
Application with Work Places
To add Xafari Workplace functionality to a XAF application, execute the following steps:
- Open application solution
- Add XafariWorkplaceModule to Module Project
- XafariWorkplaceWinModule to Windows Forms Application Project
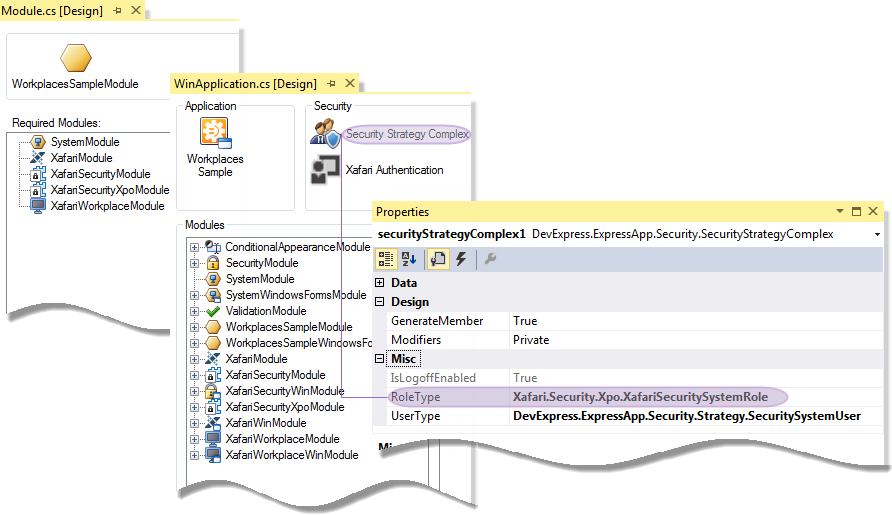
It is required to use SecurityStrategyComplex.
- Invoke Application Designer and set SecurityStrategyComplex (DevExpress.ExpressApp.Security) and XafariAuthentication for the Security section.
- Add XafariSecurityModule and XafariSecurityXpoModule (or XafariSecurityDCModule) to Module Project. XPO or DC depends on the way of the Business Model Design.
- Add XafariSecurityWinModule to Windows Forms Application Project. The image below illustrates Application Designer and Module Designer.

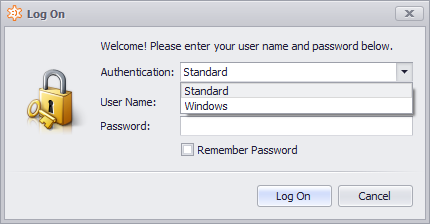
- Run the Windows Forms application. You will see the Log On window. Use Windows Authentication and log in as Admin.

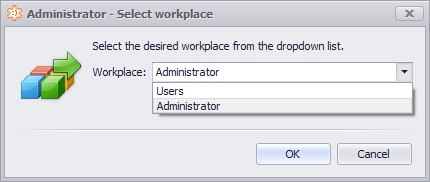
- You will see the Administrator-Select workplace. Users and Administrator are the objects of the XafariSecuritySystemRole type provided by the XafariSecurityXpoModule. When using Windows Authentication these objects are created automatically for an active user (see Xafari Security). Choose Administrator and press OK.

- Current Workplace will be displayed in the status bar at the bottom of the program window. As you can see in the application screenshots, Administrator Workplace is running:
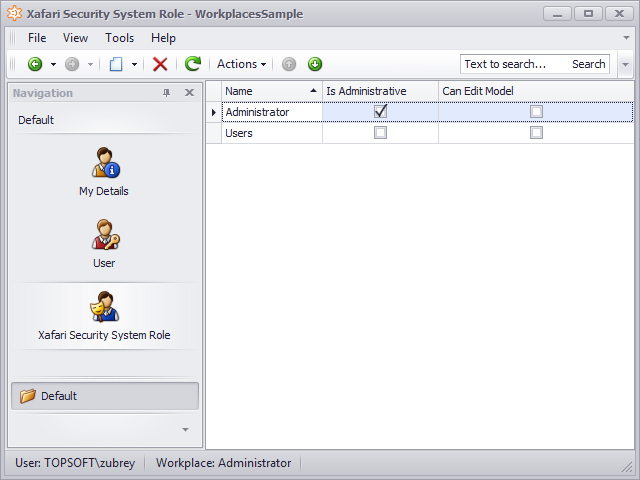

If you are logged on as Administrator, then the following navigation items will be available:
- My Details represents data about the user who is logged on.
- User navigates to the list of the registered users.
- Xafari Security System Role navigates to the list of the registered roles.
To edit users and roles user must have special permissions (see Security System).
Workplace file
The administrator can edit Model and Model Workplace "Administrator". The basic Model is stored in a Model.xafml file in the project directory. And Model Workplace file does not exist yet. There are three ways to create Workplace file:
- Manually;
- Using the application;
- Using a special editor Xafari.Workplace.ModelEditor.exe.
In this example, create a file using the application. The application has been started by us for the first time and the Model Workplace “Administrator” file was not created, it is not yet there. In any case, the system is started and the selected Workplace is set, but Workplace not stores any settings.
To edit Model Workplace “Administrator” choose Tools->Edit Workplace Model Workplace "Administrator":
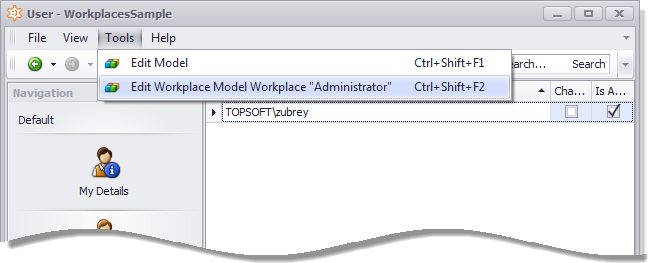

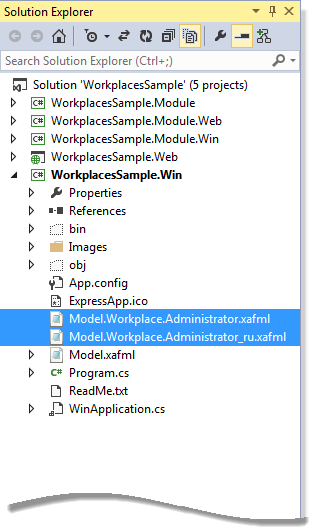
Model Editor will be invoked to edit current Workplace and Model.Workplace.Administrator.xafml file will be created. You can see it on the drive.

By default, Workplace files are stored in the application folder. To change their location, use the config file. Set value parameter to required folder.
add key="WorkplaceFilesPath" value =" "
Demonstration
Add new classifiers to the application:
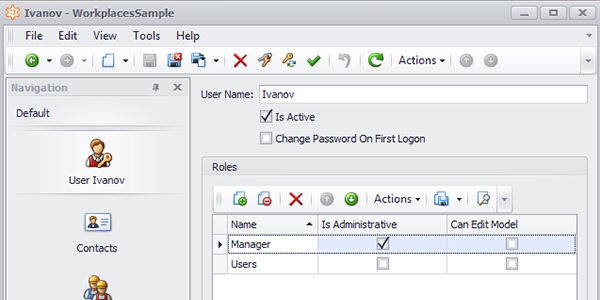
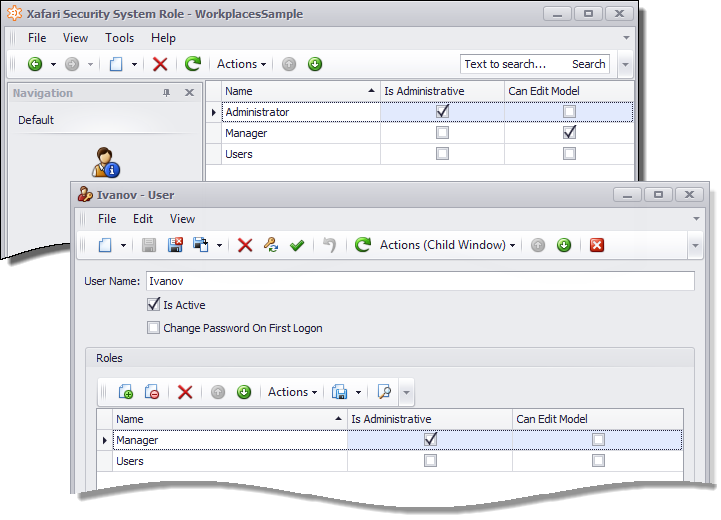
Add new role, name it Manager. For the new role, set Navigation Item Access Permissions as follows: deny access to the XafariSecuritySystemRole, User and My Details items.

Add a new user, name it Ivanov. Assign Manager and Users roles to the new user.

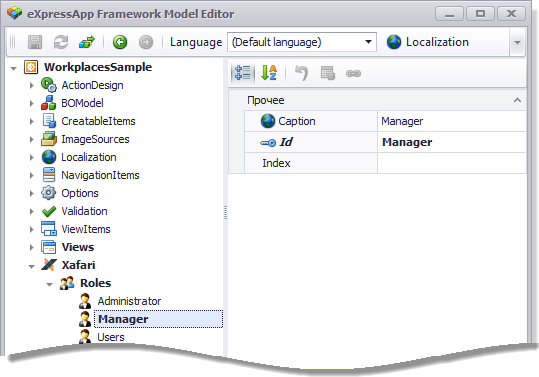
Invoke Model Editor to edit Application Model. Navigate to the Xafari|Roles node and add new Role, name it Manager. The following image shows Xafari|Roles node.

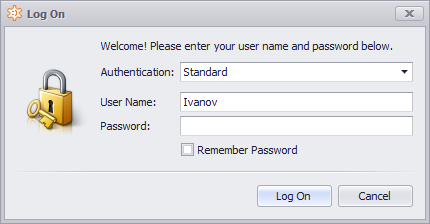
Restart application, choose Standard Authentication and set Ivanov logon parameters:
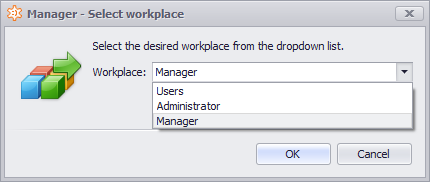
Choose Workplace Manager:
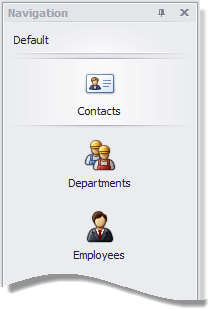
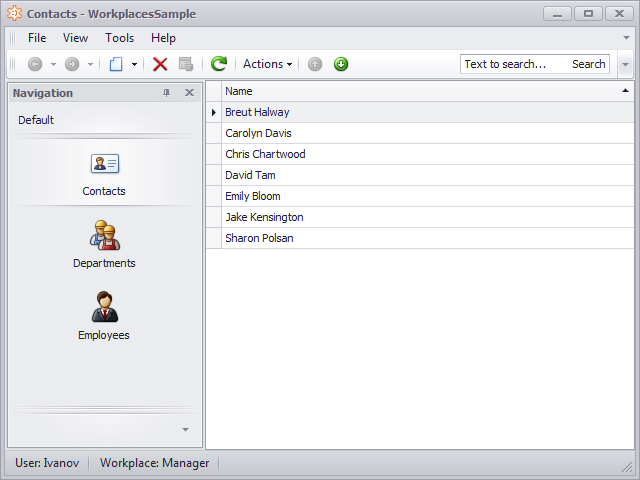
The application window is generated on the basis of the standard Application Model (Model.xafml file) and the Manager role:
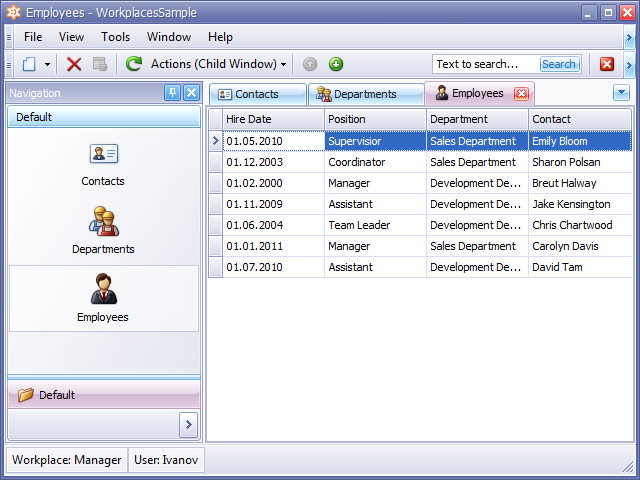
In the main menu, select Tools->Edit Workplace Model Workplace “Manager”. Focus Options node, set UIType property to the "TabbedMDI" value and set Skin property to the "Lilian". After that Manager Workplace for the Ivanov user will be displayed as follows.
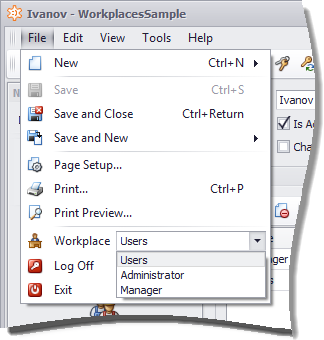
Now, let's change the Users Workplace to the user Ivanov. In the main menu select File->Workplace and set Users:

Select Tools->Edit Workplace Model Workplace “Users”. Add My Details Navigation Item, name it Ivanov and save settings. Users Workplace for the Ivanov user will be displayed as follows:
For each of the edited Workplace, a corresponding .xaml file is originated:


Notes:
If add .xafml files to the Visual Studio project directory, it can be hidden. In this case, perform "Include In Project" operation.
When developing a Web application, there are only two ways to create (edit) Workplace .xafml files:
- Manually;
- Using a special editor Xafari.Workplace.ModelEditor.exe.