Tabbed Detail Property Editor
Displays referenced object using multiple tabs. To select the current tab Property Editor provides hierarchical menu.
To fully demonstrate the features, it is required to consider business class with a significant number of properties. You can use TabbedDetailPropertyEditorObject class implemented in the Xafari.XtraEditors.Module | Editors| TabbedDetailPropertyEditorObject.cs file of the Xafari XtraEditors demo installed with product.
Note ThisObject property that returns an object of the TabbedDetailPropertyEditorObject type, i.e. this property represents the entire object.
1 2 3 4 | public TabbedDetailPropertyEditorObject ThisObject { get { return this; } } |
We will apply Tabbed Detail Property Editor to this property.
Invoke Model Editor and navigate to the Views node. Add four extra Detail Views, set ModelClass property to the TabbedDetailPropertyEditorObject value. Name them as shown in the image below.
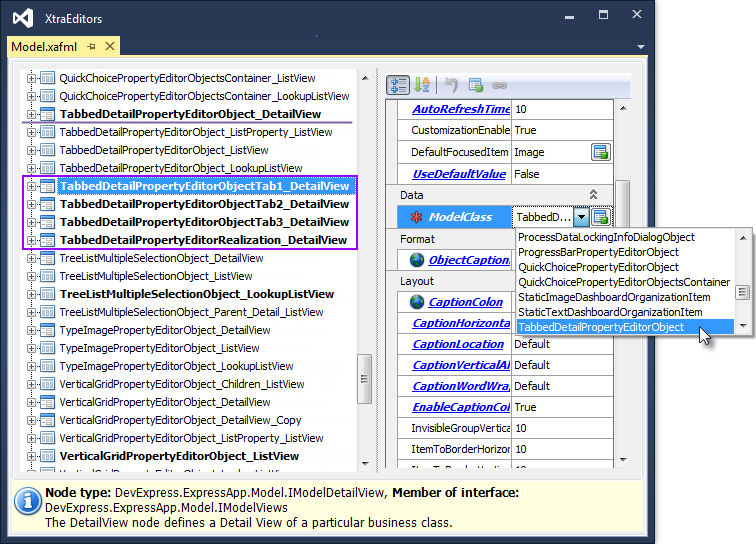
We will use them later. Each created tab will display one of them.
Next, configure the default Detail View. Navigate to the TabbedDetailPropertyEditorObjectRealization_DetailView|Items node, right-click and select Add|Property Editor from the context menu. For the new item, set the PropertyName property to ThisObject value and set PropertyEditorType property to Xafari.Editors.Win.WinTabbedDetailPropertyEditor value (or Xafari.Editors.Web.WebTabbedDetailPropertyEditor), as shown in the screenshot below.
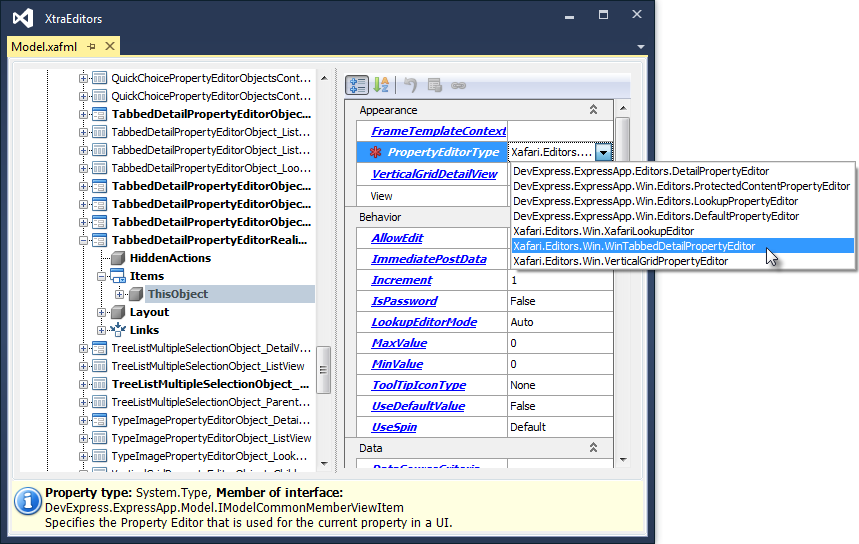
Navigate to the NavigationItems|…|TabbedDetailPropertyEditor node and set View property to the TabbedDetailPropertyEditorObjectRealization_DetailView value. Now, application will display TabbedDetailPropertyEditorObject object via TabbedDetailPropertyEditorObjectRealization_DetailView.
Navigate to the TabbedDetailPropertyEditorObjectRealization_DetailView|Items|ThisObject|Tabs node. Add four tabs. Set the DetailView and Caption properties as follow:
| DetailView | Caption |
| TabbedDetailPropertyEditorObject_DetailView | FullData |
| TabbedDetailPropertyEditorObjectTab1_DetailView | Tab1 |
| TabbedDetailPropertyEditorObjectTab2_DetailView | Tab2 |
| TabbedDetailPropertyEditorObjectTab3_DetailView | Tab3 |
The tabs are shown in the figure below. These tabs will display the respective Detail Views.
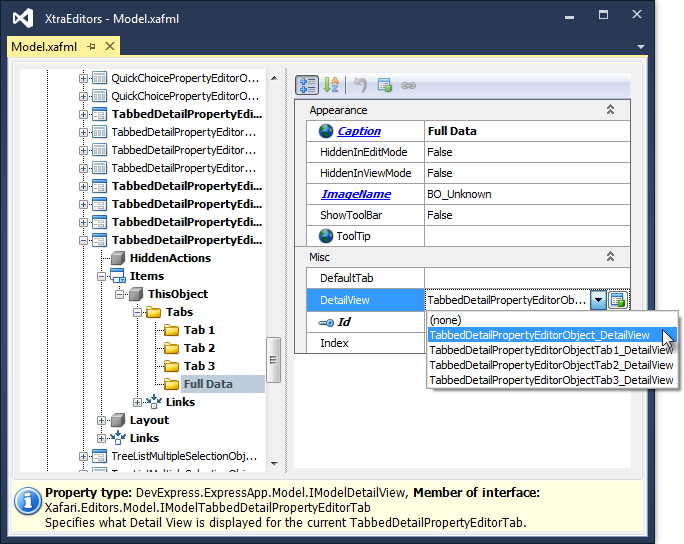
Now you can run the application and see that default Detail View alternately displays four empty tabs that correspond to the FullData, Tab1, Tab2 and Tab3 Detail Views. Stop the application.
Customize the Items and Layout nodes for the FullData, Tab1, Tab2 and Tab3 Detail Views. Thus you define the properties that will be displayed on each tab.
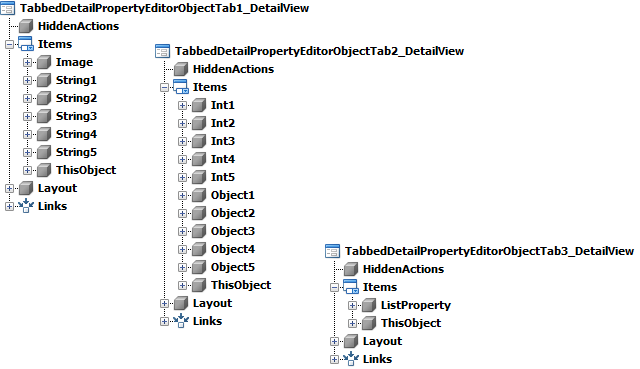
Run the WinForms or ASP.NET application and see, what they look like after the changes.
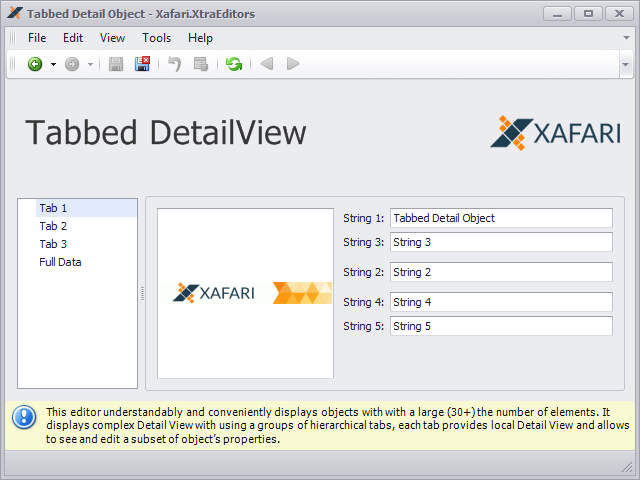
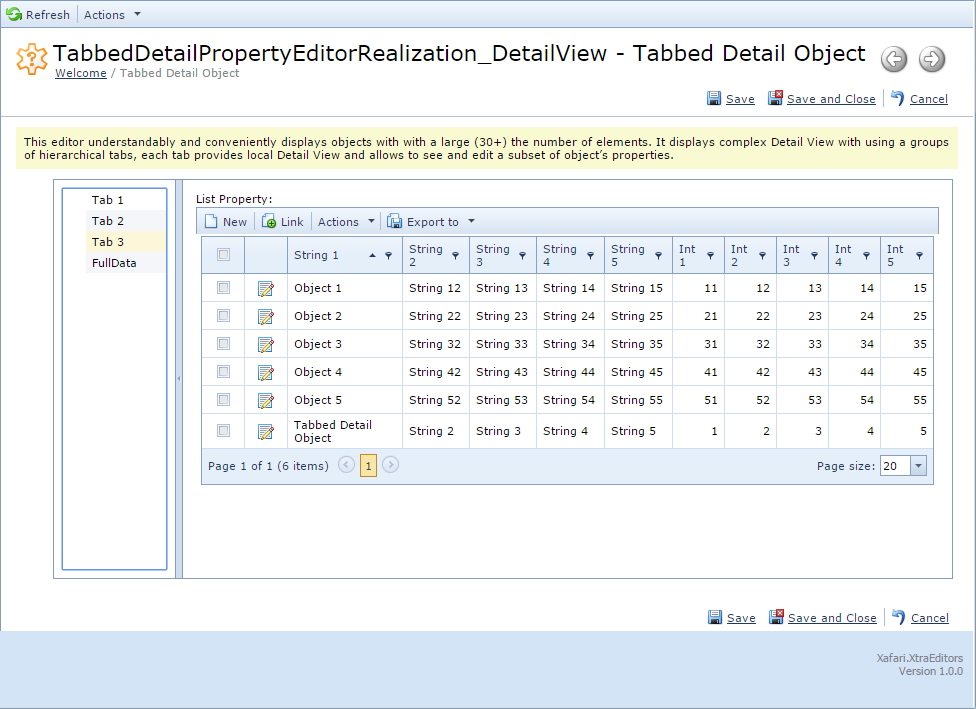
You can add an info pane to default Detail View. The info pane is a particular Detail View for the same business class. It is always displayed, regardless of which of the tabs is active. To attach info pane, navigate to the TabbedDetailPropertyEditorObjectRealization_DetailView|Items|ThisObject|Tabs |Items ThisObject|Tabs node and set the InfoDetailView property.

